How To Do Drywall Repair
 A novices guide to repairing drywall
Open that door a bit hard? Drive the car into the garage wall? Anger management issues? Whatever the cause drywall in the home comes under some rough treatment from time to time and requires repair.
You can hire a contractor to do the job, or you can decide to try it yourself. It’s actually not that hard to do.
This page will cover the basic steps, tools, and techniques needed to repair that pesky hole!
And yes, we will debunk a few of those tried and true methods for making the repair.
What Not To Do
Really… why would you do this?
Yes it’s true, there are more ways to do drywall repair than you can shake a stick at….
Just ask every one of your neighbors… they will each have a “sure fired way” to fix your problem! Replete with testimonials about how it worked for them.
Don’t waste your time! Before we can show you how to do it right… we need to warn you away form a few bad ideas…..
Specifically these next few pictures are what NOT to try!
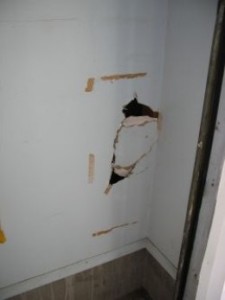
 No
No
No! Trying to get wood pieces to stay flat against the wall when you screw them in… fail.
You have to find the wood, figure out a way to cut it pretty, then figure out how to get it into the hole.
All before you figure out you can’t hold it while you screw in the screw.
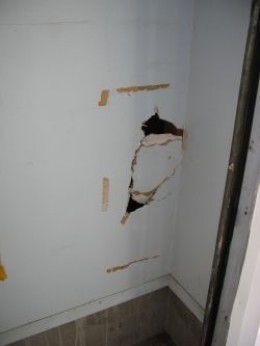
 No
No
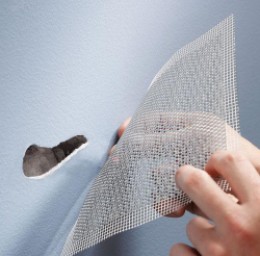
This is wire mesh.
The problem here is that you have to be very good at concealing the mesh with your drywall skills….
In most cases it will end up being a raised hump on the wall.
This idea completely begs the questions … “how to fill the hole”.
Even if you could get it pretty and smooth… it will dry as a thin veneer of mud over a hole! It will be pushed in and crack.
No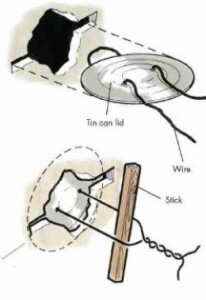

Cute idea here… Gives you a backing to fill against. You are supposed to put some sort of glue on the disc to hold it to the back of the wall.
You won’t be able to fill the hole while the stick on the front is there….
So again… you have 1/2 of fill this way. It will require multiple iterations of fill, let dry, fill let dry… rinse repeat. More so than the method I recommend.
Further, it is likely that you will push off the backing with force of your mudding.
It takes more time, don’t waste your time with this idea.
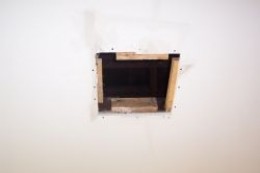
Drywall Repair – Step 1
Measure the hole
That’s right. Measure the hole.
Left to right, top to bottom. Come up with a measurement that is just wider than the broken section.
You are doing this to come up with the cut dimensions of the repair piece.
Go get a piece of 1/2″ drywall and cut out a section that matches your measurements.
Drywall Repair – Step 2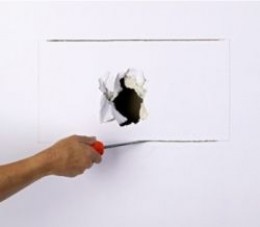
Make the hole bigger
What!?
You heard right.
Take the pretty piece you just made and lay it over the hole.
If you measured it correctly, it will completely cover the hole.
Trace around it with a pencil.
Now cut out the busted section following your pencil line.
Drywall Repair – Step 3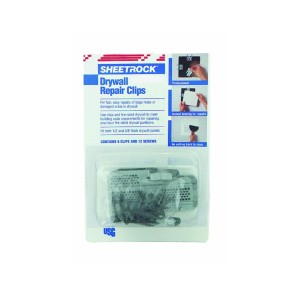
Get the Clip!
That’s right kids…. this little baby is the secret to a really good repair job.
Made by USG, they are the repair pro’s secrete to a speedy drywall repair.
I am assuming you do not have a stud on either side of the hole that you have opened.
You use these clips to replicate the strength you gain from having the stud present. So if you have a stud on one side of your opening, you don’t need a clip there.
Simply slide the clip into place and screw it in to secure it to the wall. Let the screw head indent into the drywall paper just enough to go below the outer plane of the drywall, but not enough to break the paper. If you put the screw in at a good right angle to the plane of the wall this will be easy.
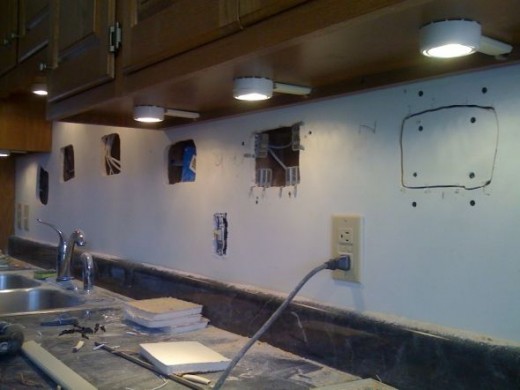
This project is installing under cabinet lighting. Multiple holes need to be cut into the drywall to run the wires. The pieces were saved and are now being put back into place.
This shot shows how the clips are installed and how the piece of drywall is placed and secured into the hole.
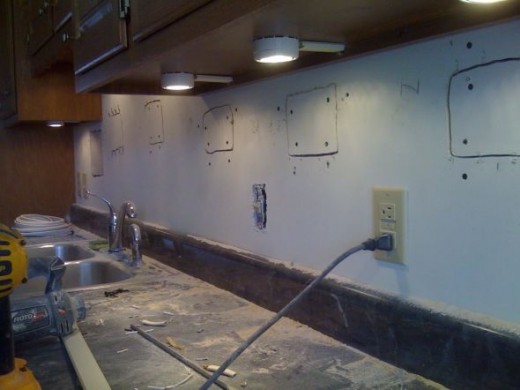
All the pieces have been installed and it’s ready for the next step…. mudding.
Drywall Repair – Step 4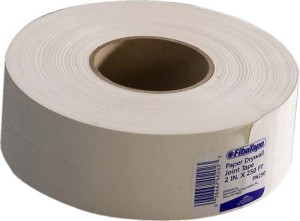
Tape and mud
So ok… we are not talking about scotch tape. It’s actually paper. It comes on a roll and it’s about 2 inches wide. Paper drywall joint tape is the proper name.
They make all kinds. Don’t get confused. You don’t need sticky back; you don’t need mesh; you don’t need fiberglass, colored, or mold resistant. Plain paper will do just fine, and turns out …. it’s the least expensive!
Mud? Well it’s called drywall mud, or joint compound. You will need this along with a good knife. This one works just fine…Dap 10100 Wallboard Joint Compound, 3-Pound.
Now cut 4 pieces of tape, each the length of one of your joints. Put them in the sink and get them soaking wet.
Take some drywall mud and screed it down along the joint. Make it a thin layer. It needs to 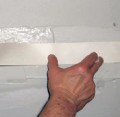 cover the paper completely but it does not need to be thick.
Then press the wet tape into this mud bed, on top of the joint.
Take the knife and screed out the mud from under the tape. Don’t let the tape move now.
Do this for all four joints.
Remember as you complete a side… and you put down your mud bed on the next joint…. you drag a bit of mud over the top of the piece of tape you just put down.
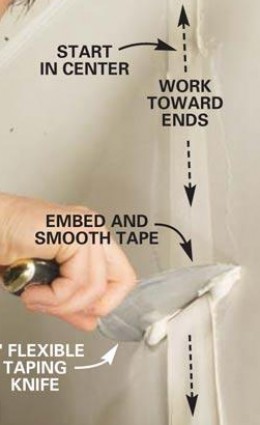 When using the knife, start somewhere past the beginning and work the mud to the end. Remember to keep your tools clean.
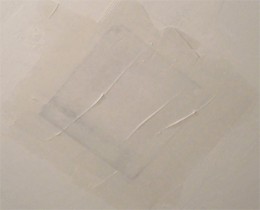
This shot is there to show you when to stop playing. After you put all 4 pieces of tape on… you screed across a thin layer of mud to cover the tape.
You fill the difference between the plane of the drywall and the top of the tape.
Drywall repair happens in steps. you have to let this dry… come back and sand a bit… then add more.
Drywall mudding is a multi step process that requires patience: you sand the ridges and fill the valleys. With each successive application, less mud is needed. The valleys are filled and the ridges are less tall.
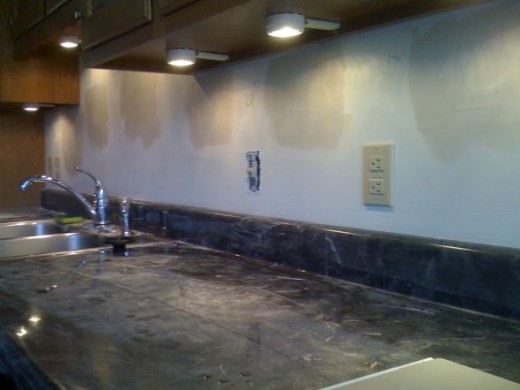
Here is our lighting project again. This is after round 1 of drywall mud. There are ridges… but it’s not that thick. With good lighting casting shadows you can easily see the valleys.
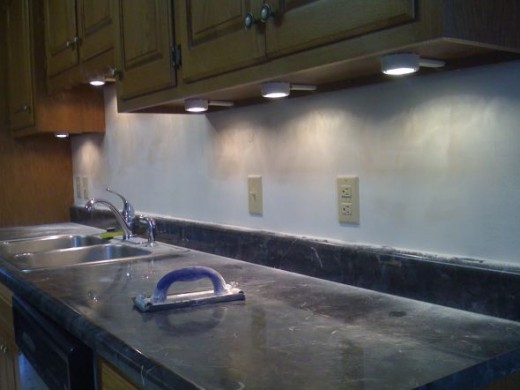
Here our project has had 3 rounds of mudding… you sand lightly between each round with 120 grit sand paper made for sanding drywall.
As you sand… remember to do so lightly. Too heavy a touch and you will expose your paper.
Run your finger across the line … from the painted surface that’s ok… and the drywalled area. Do you feel the line? If so, sand lightly until it disappears.
Remember this is an incremental process…. be patient.
After 3 to 4 iterations you should be ready to paint!
Hey leave some feed back! Let me know what you think about this content of this page. Was it helpful? Discuss your project, how did it go?
2 Comments
I love your illustrated instructions. It makes it so much easier to understand.
Many people think that drywall repair is a simple and easy handyman job, but even though it might seem so, it could always go wrong. I’ve had clients asking me to fix the repair they did on their own, because they messed it up. If more people know the trick you’ve shown for pulling out the damaged piece, I bet there would be a few handyman services delivered extra. If people want to have a properly don job, like what you’ve shown in photos, it’s always best to find a professional handyman and avoid the nerves and any potential extra damage. In conclusion: even though household repairs might look simple – there’s a reason for professional handymen to do it. I’m sure you will agree? 🙂
Follow Us on Twitter
Tag Cloud
Awesome Posts